
Read this first: the first choice you make, Form Type, is permanent. If you choose Group RFP, the form starts with a set of enquiry fields and both email templates already built. If you choose Blank, you build all of it by hand, and you cannot change your mind afterwards.
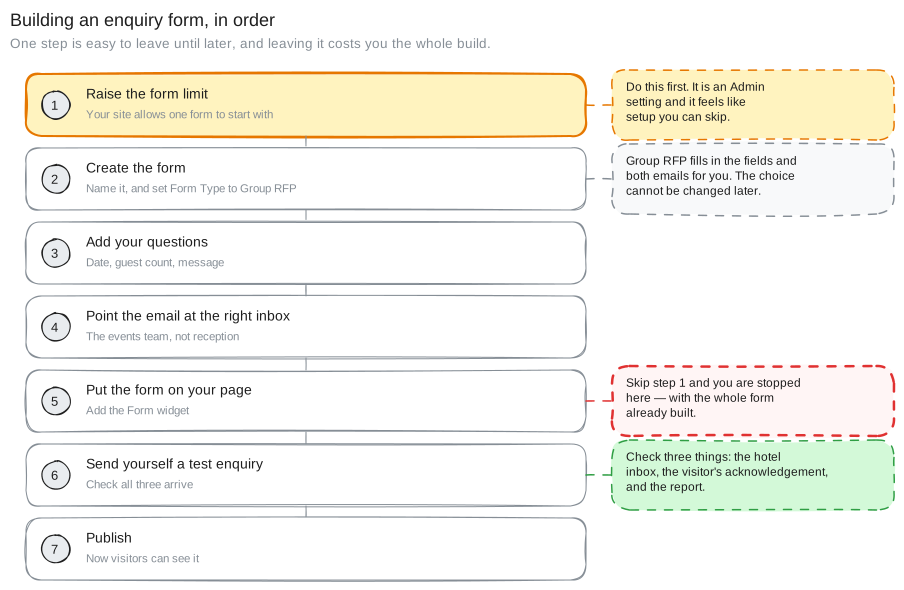 Seven steps, and the first one is an Admin setting that is easy to skip. If you skip it, you are stopped at step 5, with the whole form already built.
Step-by-Step Instructions
Phase 1: Unlock Extra Forms
Your website allows one active form to begin with, so a wedding form beside an existing contact form needs the limit raised. That takes two settings under Admin which you ask our support team to change. See step 2, Ask for More Than One Form, in How to Manage Website Forms.
Do this before Phase 2. If the limit is still one, the Page Editor refuses the second Form widget in Phase 4, after you have built the form.
Phase 2: Create the Form
Path: Website CMS → [your domain] → Website → Forms
2a. Create it from the right starting point
- Click ADD FORM.
- Name it for the type of event, such as
Wedding RFP,Meetings EnquiryorGolf Outing Request. - Set Form Type to Group RFP. This type starts the form with enquiry fields, a success message and both email templates.
- ⚠️ This cannot be changed later. It does not appear anywhere on SETTINGS once the form exists.
- Set the Tracking Form Type to the enquiry category, so the form is labelled usefully in your reporting. You can change this one later.
- Click SAVE.
2b. Add the questions for your type of event
Open the form with MANAGE ▾ → Manage and work on the FIELDS tab. Group RFP has already given you the common fields. Add the ones your enquiry needs.
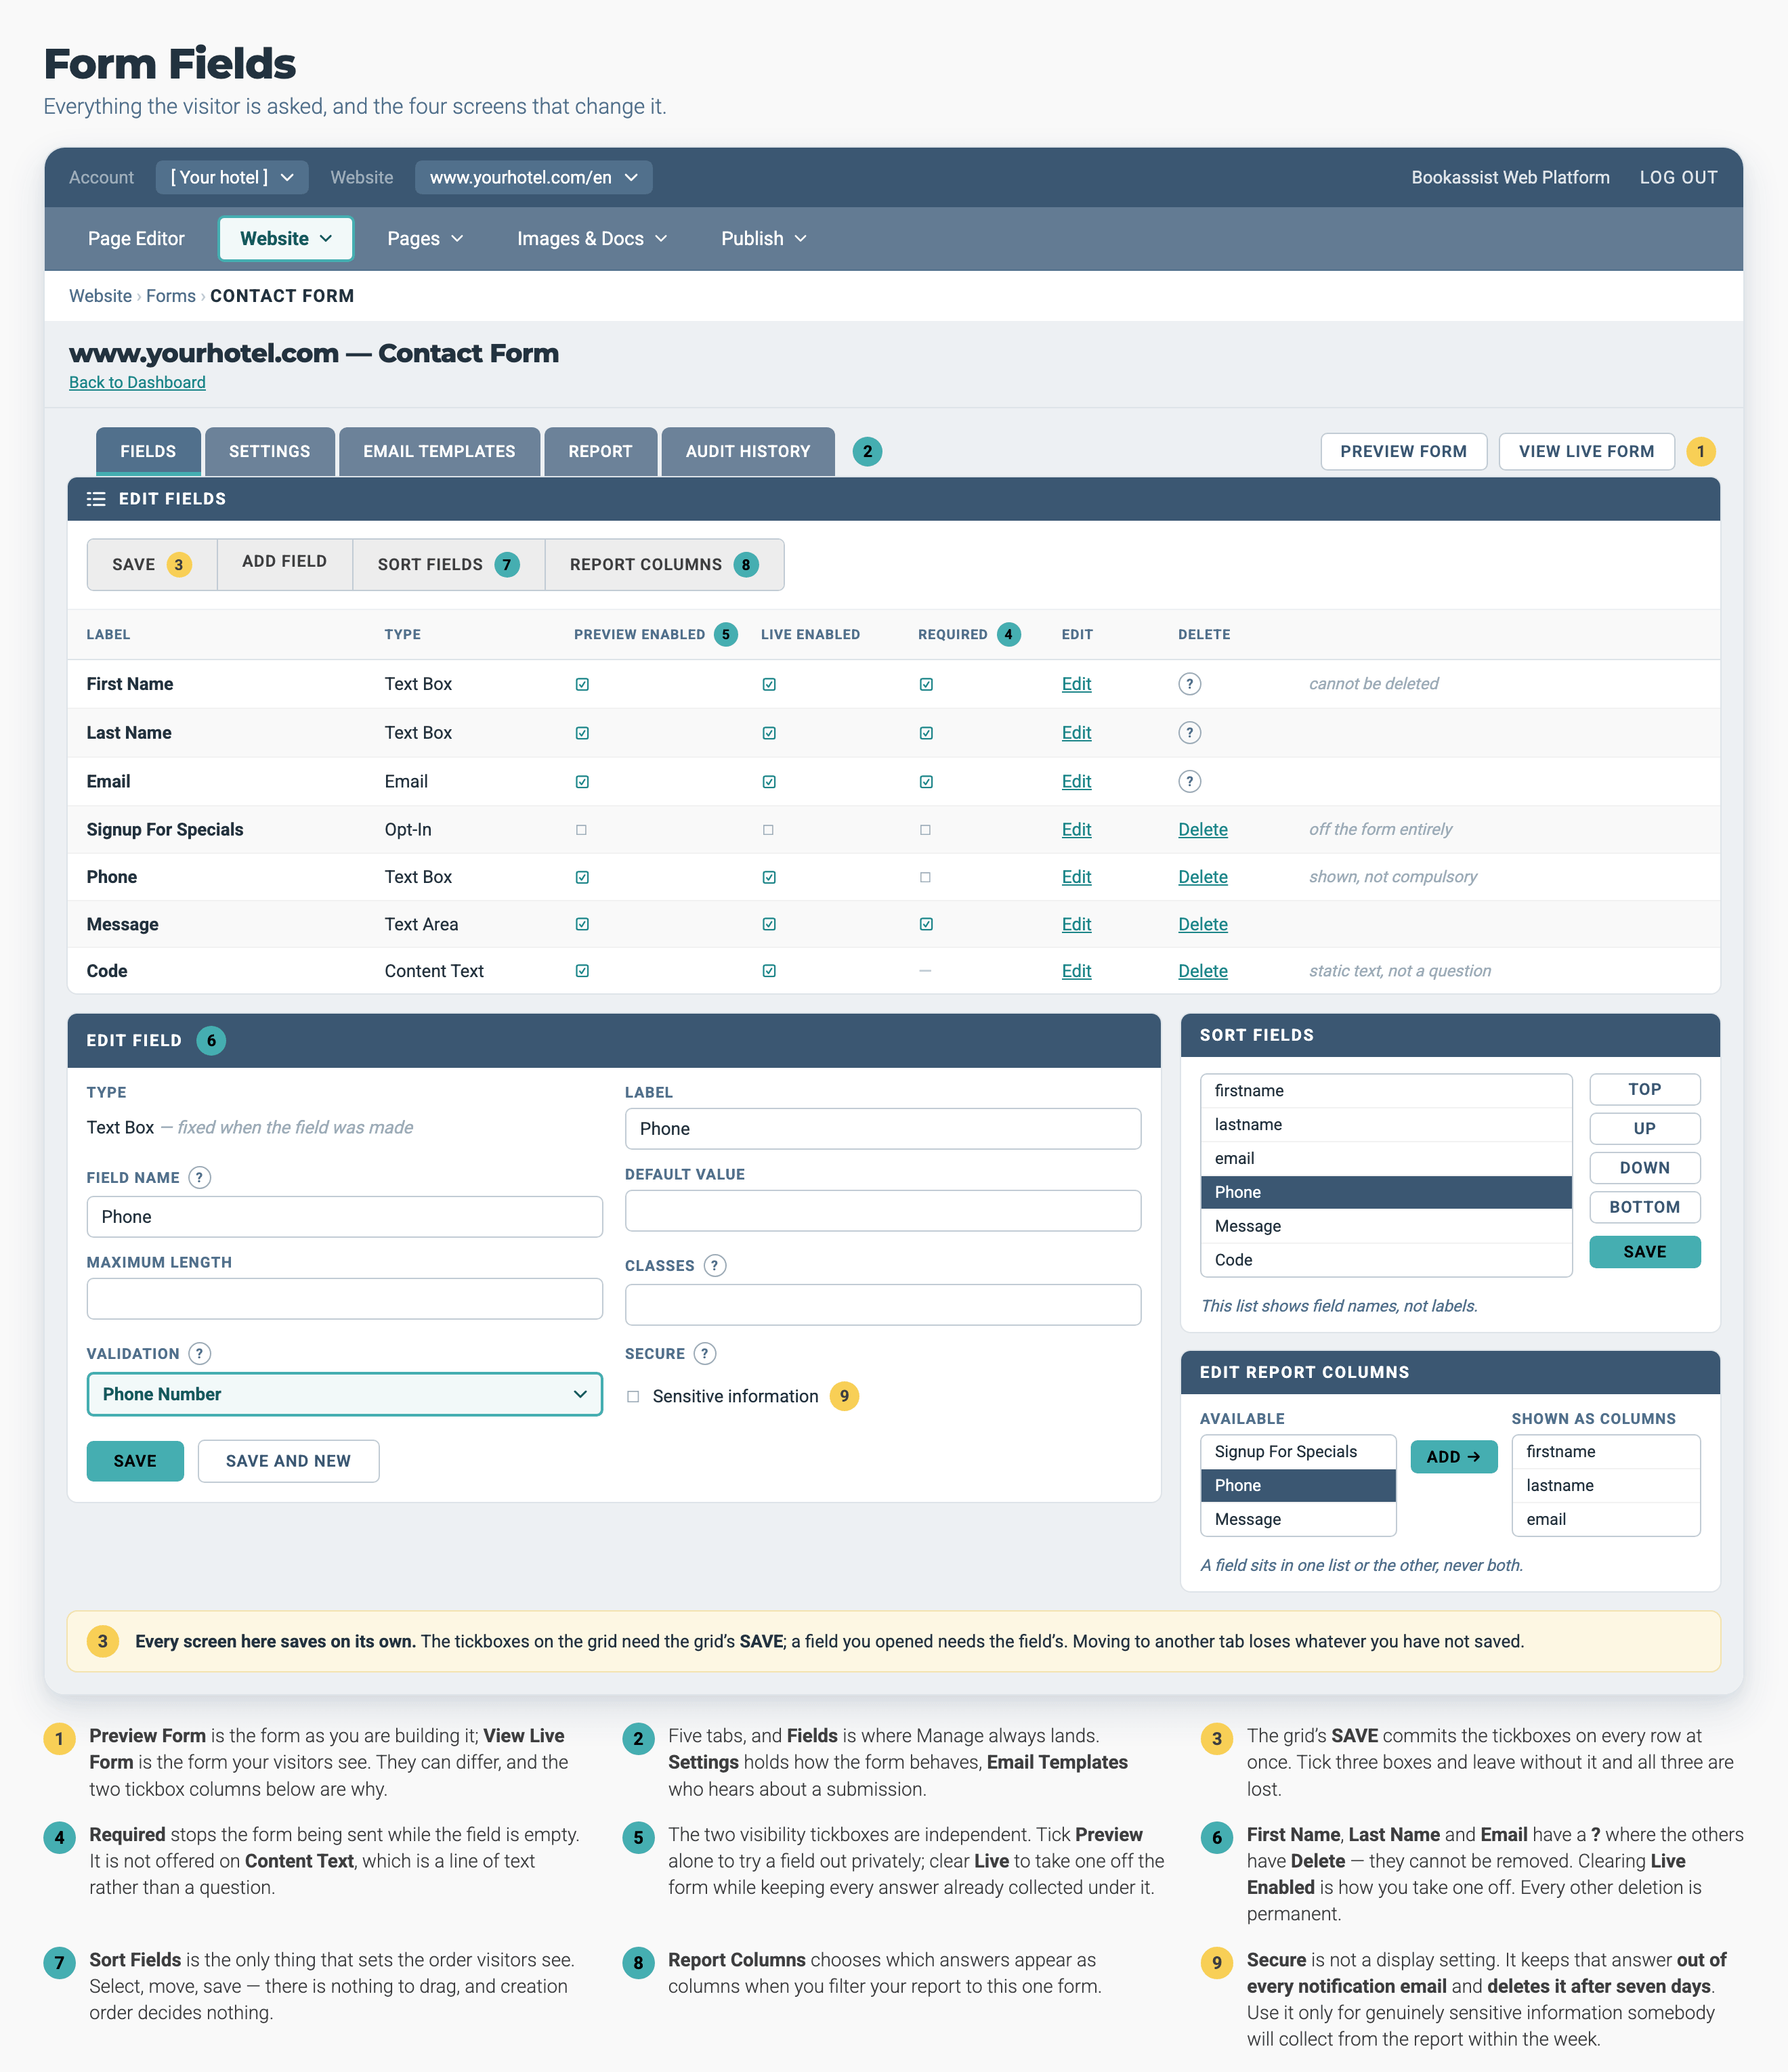
Each field has its own required tick. The three core fields cannot be deleted: where the others show Delete, they show a tooltip that explains why.
- Weddings
- Proposed date · Guest count · Ceremony or reception · Catering requirements · Message
- Meetings & conferences
- Company · Event dates · Number of delegates · Room layout · AV requirements · Catering · Message
- Golf
- Preferred date · Number of players · Tee time preference · Message
For each one, click ADD FIELD, choose the type, write the label and the field name, and click SAVE. Use Date for a date so visitors get a date picker, and Text Area for the message.
2c. Mark the answers you need before you can quote
Tick Required on the row of each field your team cannot quote without: a name, an email address and the event date. A visitor cannot submit the form while a required field is empty.
Keep the required list short. Every extra required question loses some enquiries, because the visitor is still deciding whether to ask.
2d. Write the success message
On the SETTINGS tab, set Success Message to something that tells the visitor when to expect a reply: "Thank you for your enquiry. A member of our events team will be in touch within two working days." Then click SAVE.
Phase 3: Send the Enquiry to the Right People
An RFP form is only worth building if the enquiry reaches the right inbox quickly. The full detail is in How to Set Up Form Notification Emails. Three things matter most here.
- Set To Email Addresses on the property template to the person who answers that type of enquiry, such as the events coordinator, the wedding manager or the golf professional. Separate several addresses with a semicolon.
- ⚠️ A template with no recipient saves without any warning and then emails nobody. On a form that brings in high-value enquiries, check this first.
- Write the guest acknowledgement so that it names the enquiry, for example "Thank you for your wedding enquiry", and include
{!ReferenceNumber}so both sides have a number to quote. - Save twice if you changed two things. Choosing which templates the form uses is a separate save from editing what a template says.
One form can serve several departments. If you would rather run a single Event Enquiry form than three, add a Type of event dropdown, open it with Edit, and tick Dynamic email notification. The enquiry then goes to the contact for the option the visitor chose.
Phase 4: Put the Form on the Page
Path: Page Editor → [your event page]
- Open the page, such as
/weddings,/meetingsor/golf, from the page tree on the left. - Click Add Widgets in the toolbar.
- Choose the region the form should sit in, search for
Form, and add the Form widget. - Hover over the green widget label at the widget's top-left, then click Edit.
- Choose your form from the dropdown, and set the heading that appears above it.
- Click Save, then Publish.
Saving is not publishing. Your changes stay in preview until you click Publish. See How to Publish Your Site.
The widget decides which form appears, where it sits and how big it is. Everything the visitor is asked comes from the form itself, so a wrong question is fixed on the FIELDS tab, not here.
Pro-Tips & Troubleshooting
- A form for each type of event keeps reporting readable. Separate wedding, meetings and golf forms give you three conversion figures instead of one, and each form emails its own inbox with no routing to set up. Run one shared form only when the enquiries genuinely ask the same questions.
- Do the unlock first. If the form limit is still at one, Phase 4 blocks the second Form widget after you have built the form.
- Leave Auto Opt-in unticked. Somebody asking for a wedding quote has not agreed to your newsletter. Add a visible opt-in field if you want that consent.
- Test the whole path before the page goes live. Submit the form yourself and confirm the enquiry reaches the venue inbox, the acknowledgement reaches the guest, and the submission is in the report.
- Check that the report shows the answers you asked for. A form's report lists names and email addresses until you add the other answers as columns. See How to Read Form Submissions.
- Building the same form in another language? The Language setting does not translate your labels. Use CLONE on the SETTINGS tab and rewrite them.
→ Next: How to Read Form Submissions — reading and exporting the enquiries as they arrive
Related: How to Manage Website Forms — creating a form and its fields · How to Set Up Form Notification Emails — the two emails a submission sends · How to Add a Widget to a Page — placing the form · How to Publish Your Site — taking it live