
Read this first: Save and Publish are two different things. Saving keeps your work where visitors cannot see it. Nothing reaches a visitor until you publish. Publishing sends everything that is saved on the site, including your colleagues' edits.
Step-by-Step Instructions 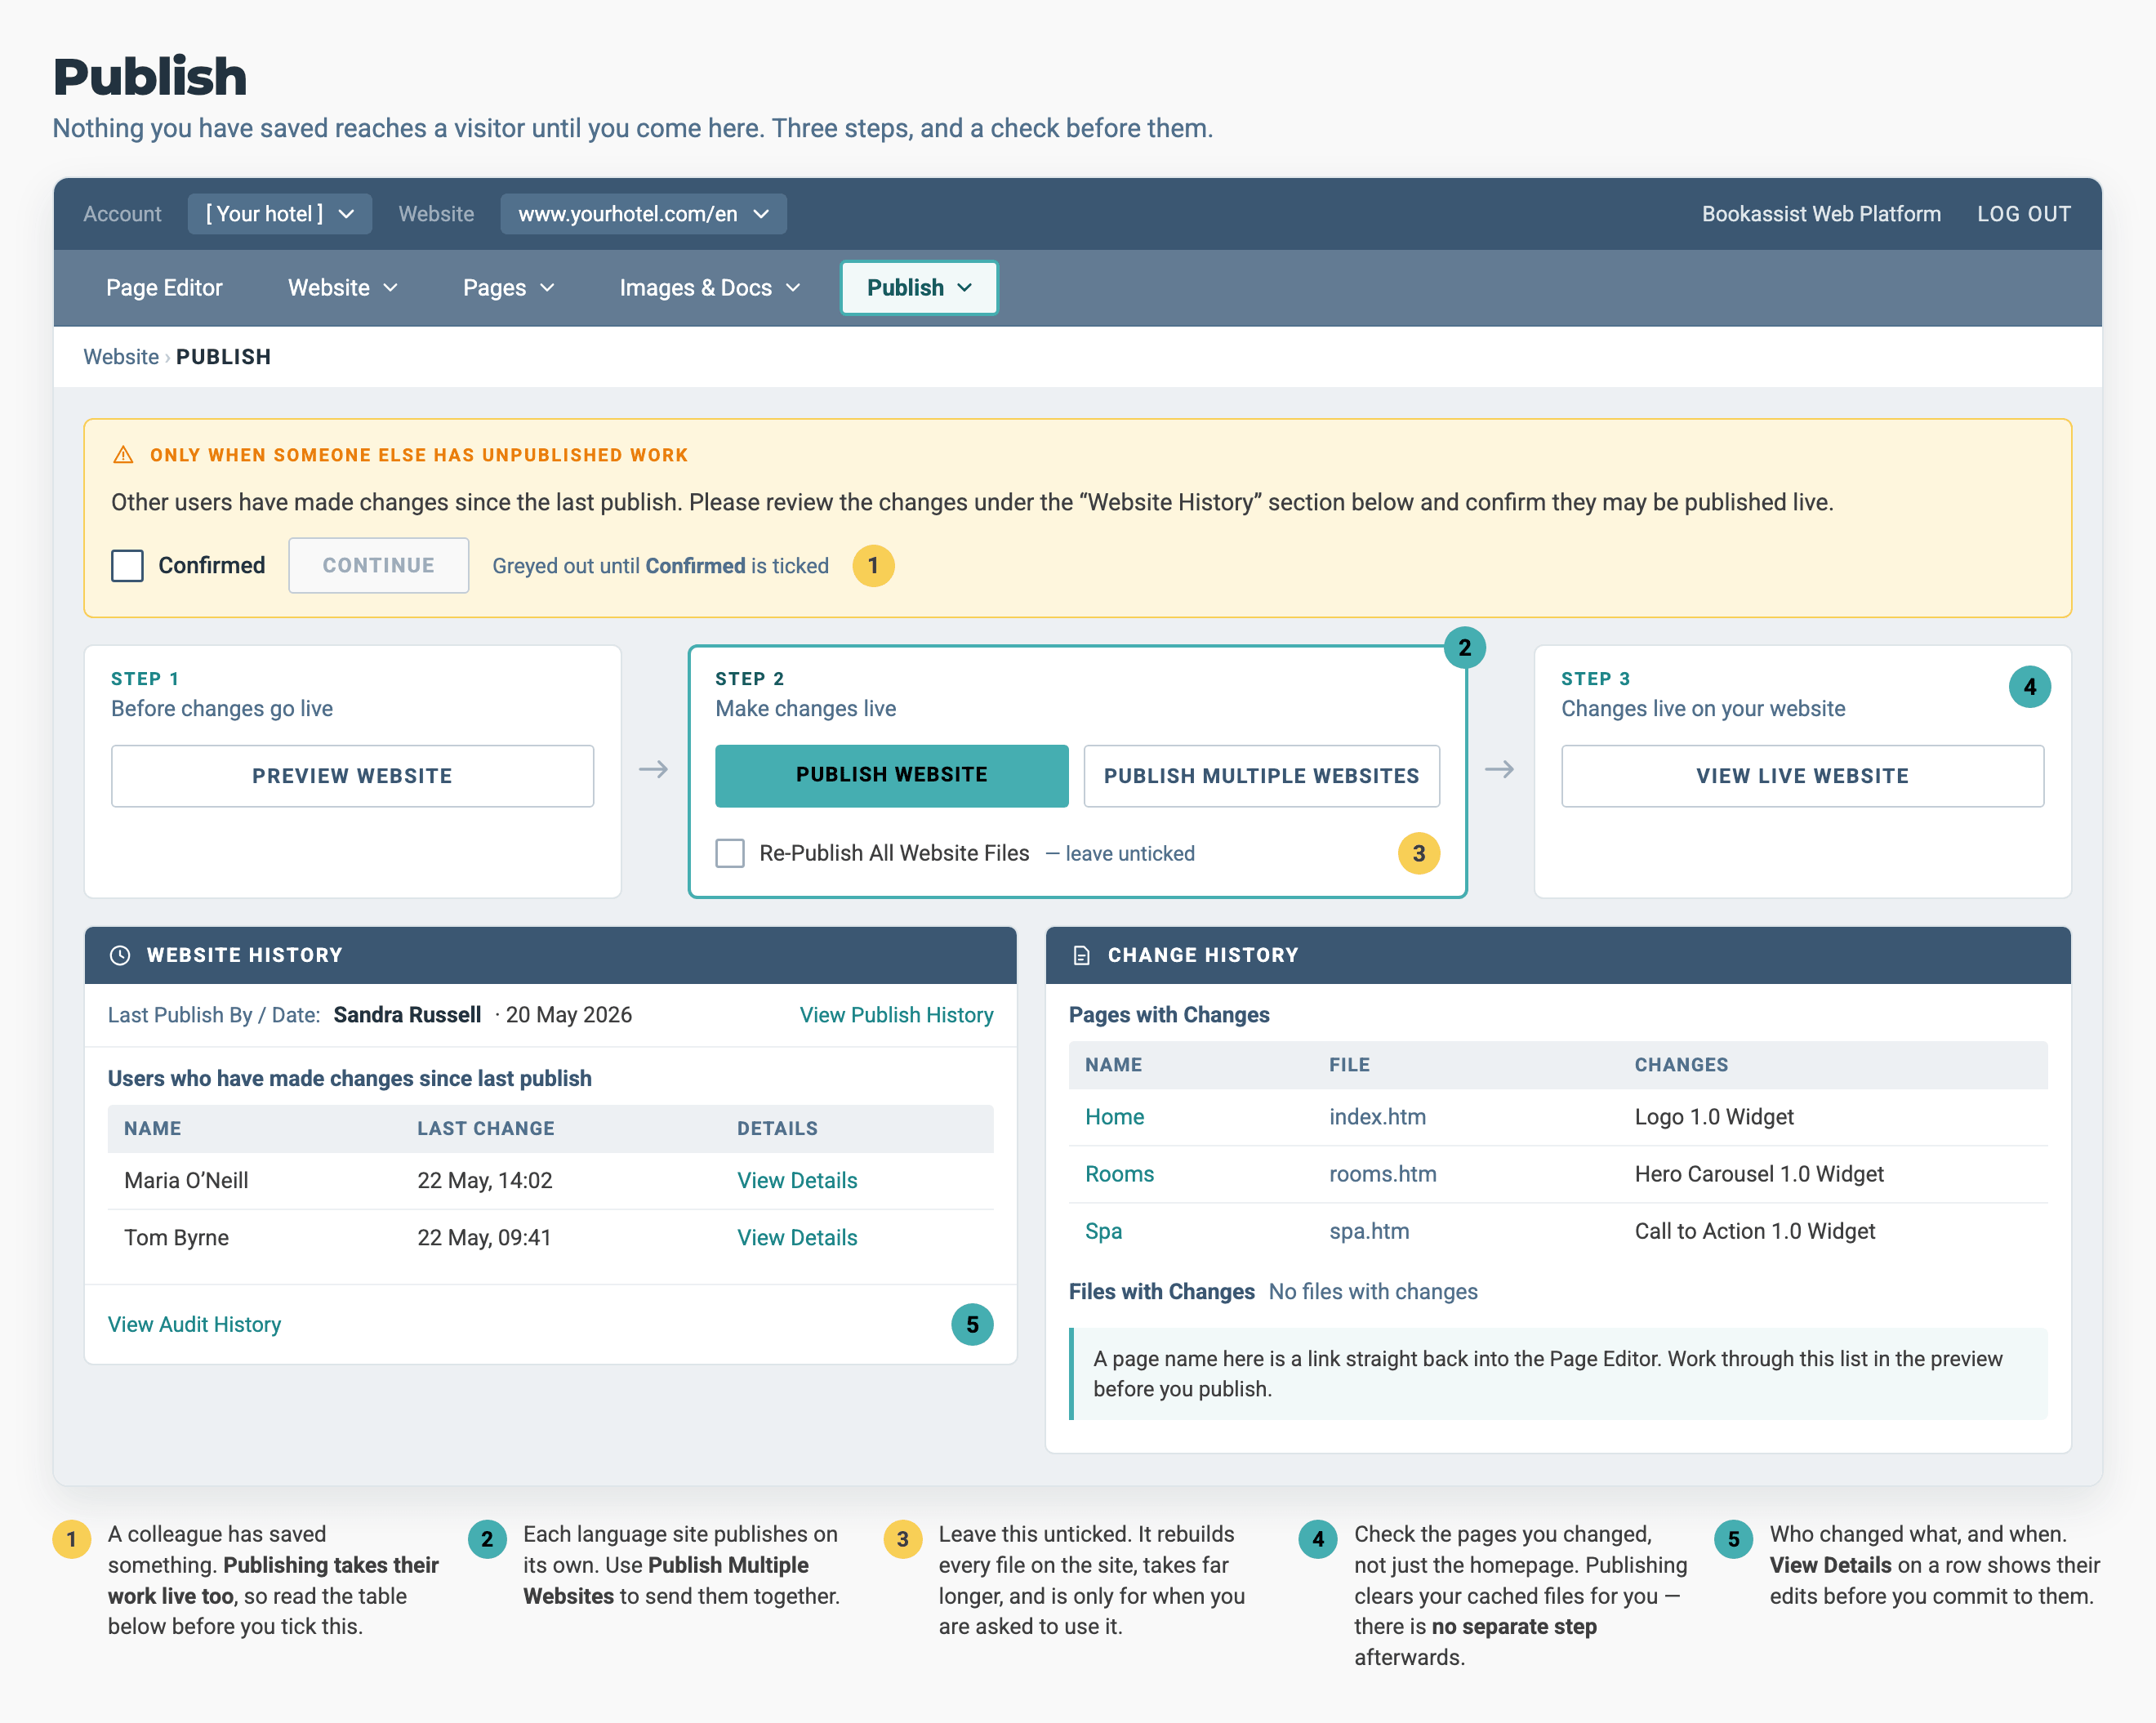
The three steps on the screen read left to right: preview, publish, then view the live site. The banner at the top appears only when a colleague has saved something since the last publish, and you cannot publish until you have confirmed it.
1. Open the Publish Screen
- Navigate: Click Publish in the top toolbar.
- Result: The screen shows three numbered steps, a list of who has changed what, and a list of the pages affected.
2. Check Whether Anyone Else Has Unpublished Work
- Look for a Yellow Banner at the top of the screen. If there is none, go to step 3.
- Read the Website History Section: It lists everyone who has saved something since the last publish, with the date. Click View Details on a row to see what they changed.
- Decide: If their work is not ready for visitors, stop and talk to them. Publishing sends their changes live along with yours.
- Confirm: When you are happy, tick Confirmed and click [ CONTINUE ].
- ⚠️ You cannot publish only your own changes. This is your last chance to stop a colleague's unfinished work going live.
3. Preview Before You Publish
- Click [ PREVIEW WEBSITE ]: Your site opens in a new tab, with all staged changes applied.
- Check the Pages You Changed: The Change History section lower down lists every page with edits waiting. Check each one.
- Check on a Phone Size Too: The preview has a size selector. It also has a Get Mobile QR Code button, so you can open the preview on your own phone.
4. Publish
- Click [ PUBLISH WEBSITE ].
- Wait for It to Finish: The platform rebuilds the site and replaces the live files.
- If Your Site Has Other Languages or Domains: Use [ PUBLISH MULTIPLE WEBSITES ] instead, and tick each one you want to publish. Each language site is separate, and publishing the main site does not publish the others.
- ⚠️ Leave Re-Publish All Website Files unticked. It rebuilds every file on the site instead of only the changed ones, and takes much longer. Tick it only when you have been asked to.
5. Check the Live Site
- Click [ VIEW LIVE WEBSITE ].
- Check the Pages You Changed, not only the home page.
- Result: Publishing also clears the stored copies of your files, so you have nothing else to do afterwards.
Two Things That Do Not Wait for Publish
Almost everything in the CMS is staged until you publish. There are two exceptions, and both catch people out.
| What | When it reaches visitors |
|---|---|
| URL redirects | The moment you add or save one |
| Forms | When you save the form |
This matters most when you rename a page. The rename waits for Publish, but a redirect does not. If you add the redirect first, visitors are sent to a page that is not live yet. The safe order is:
- Rename the page
- Publish
- Check the new address loads
- Add the redirect
- Check the old address now lands on the new page
Pro-Tips & Troubleshooting
- Publish once, at the end. You gain nothing by publishing after every edit, and each publish sends everything that is saved. Finish the job, preview it, then publish.
- The old version is still showing. Wait a few minutes, then open the page in a new browser window. If the old version is still there, email support@bookassist.com and the team will clear it for you.
- A page you did not touch is in the change list. Either someone else edited it, or a widget that appears on every page was changed. Click View Details on the Website History row to see who changed what.
- Your personalised content looks wrong in the editor. The Page Editor always shows the default version. Check the personalised versions on the live site after you publish. How to Test Personalisation shows you how.
- A button named here is not on your screen. It is switched off for your account, and nothing on the screen shows that it is missing. Email support@bookassist.com and name the option you need.
- You often publish several language sites. Use [ PUBLISH MULTIPLE WEBSITES ] every time instead of publishing each site separately. It publishes them all at once, so no language site is left behind.
→ Next: How to Manage a Multi-Language Site — keeping several language sites up to date with each other