When you first log into the Bookassist Web Platform, your homepage dashboard is intentionally designed to give your team immediate, front-facing visibility into your guest interactions.
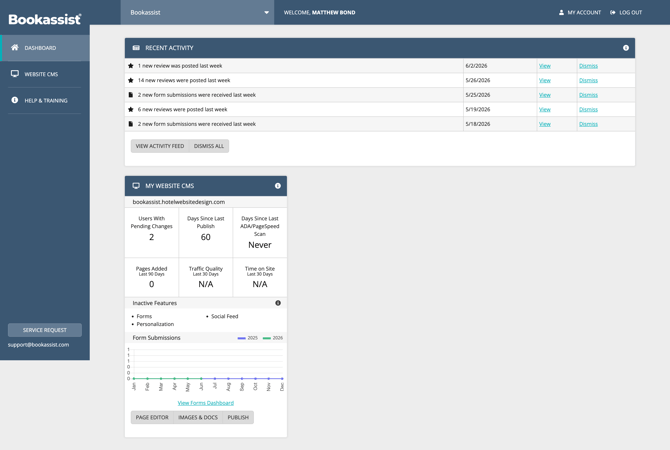 |
Right on login, the Recent Activity panel updates you on new leads, while the Form Submissions section displays a visual chart comparing performance trends. Because following up on guest inquiries promptly is vital to maintaining high conversion rates, these analytics are placed front and centre. From this screen, you can easily access your full leads portal to manage submissions.
💡 Property Tip: If you are trying to set out a brand-new form from scratch or need to increase the total number of active forms allowed on your website, this requires an administrative setup. Please click the Service Request button at the bottom of your sidebar or reach out to support@bookassist.com for assistance. Our team can quickly unlock your custom web form infrastructure and increase your widget instance limits.
Step 1: Accessing Your Forms Manager
If you are modifying an active contact form or setting up a standard sign-up tool, navigate directly into your page content system:
- Log into the platform at https://web.bookassist.com/
- Expand the Website CMS menu in the left sidebar and select your specific hotel domain.
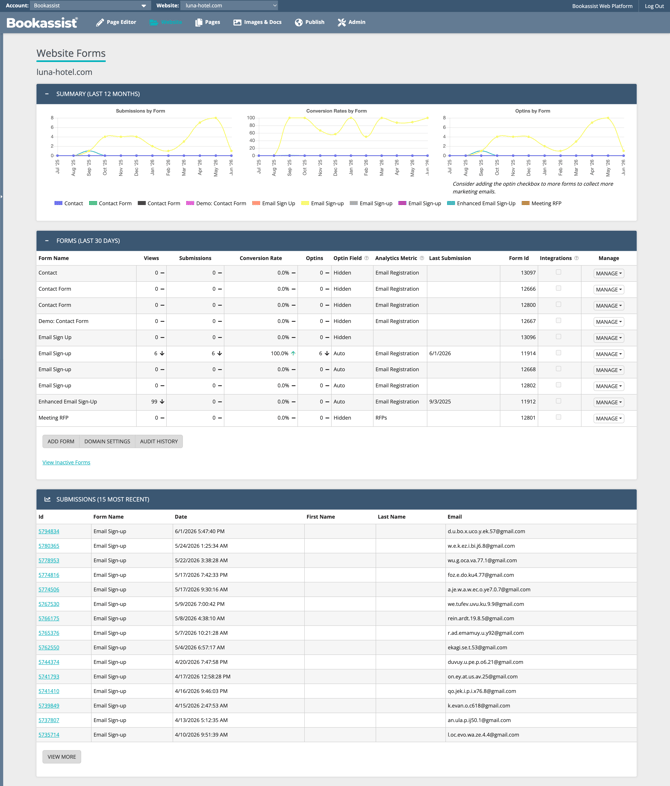
- Once the CMS Page Editor loads, locate the row 2 tab navigation bar at the top, click Website, and select Forms.
- Look for your form (such as your Demo: Contact Form) in the Active Forms table, click its MANAGE ▾ split button on the right, and choose Manage.
 |
Step 2: Customising Fields and Email Templates
The Form Manager contains a series of tabs that let you modify the logic and layout of your form:
- FIELDS Tab: This panel displays every active input field. You can click ADD FIELD to create a fresh line or click Edit on any row to change a label name or apply custom styling. Use the Live Enabled checkbox to show or hide options from your visitors, or check Required to make an item mandatory before submission.
- SETTINGS Tab: Here you can tailor the user-facing Success Message text box. This is the "Thank You" verification text displayed to the visitor immediately after a successful form entry is completed.
- EMAIL TEMPLATES Tab: This controls automated notifications. Click Edit on your Property Template to configure the To Email Addresses field for your hotel staff. If you are routing incoming inquiries to multiple team members, separate their email addresses with a semicolon (
;) and ensure there are no spaces. You can also use the dynamic token dropdown to insert fields like{!ReferenceNumber}or{!AllDataFieldsTable}to map data right into the body of the message.
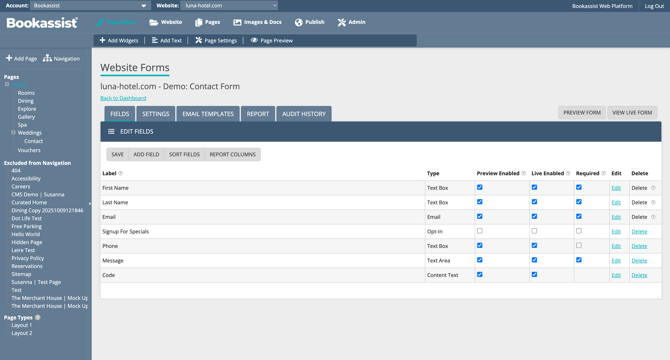 |
⚠️ Caution: Core inputs like First Name, Last Name, and Email often feature a warning icon; do not delete these, as it can break submission routing. Some out-of-the-box fields cannot be permanently deleted. If you do not want them to display, simply uncheck the Preview Enabled, Live Enabled, and Required boxes. Always click Save inside the field sub-editor to commit your adjustments manually.
Step 3: Deploying the Form with a Page Widget
Updating your form settings changes its background behavior, but it does not automatically place it onto a page. To display your form to website visitors, you must link it to a visual widget:
- Use your Page Editor's left sidebar page hierarchy list to click on the target page where the form should live (e.g., Contact Us or Home).
- Click the + Add Widgets option in the row 3 toolbar.
- Choose the region where you want the form container anchored and click the green 'add it here' block.
- Select the standard Form widget from the picker menu.
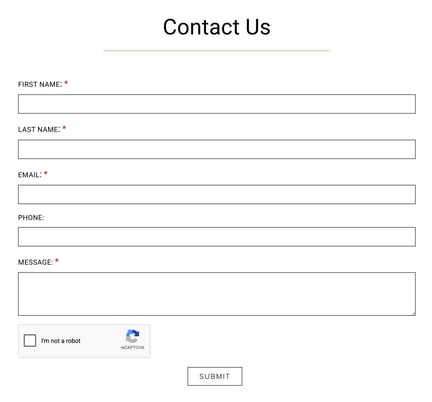
- Inside the widget customisation settings window, select your Form from the dropdown list, make sure the Auto Size checkbox is ticked so it scales smoothly on screen sizes, and provide a required heading Title (such as "Contact Us") to display above the form.
- Click Save on the widget panel.
- Go Live: Your adjustments are safely held in a sandbox preview environment. To officially push the form to your public live website, click the Publish button on the page toolbar.
 |
Available Layout Widgets & Live Demos
When selecting a tool from your widget menu, there are several visual layouts available depending on your campaign goals:
- Standard Form Widget: The core tool used to display any custom form you manage.
🔗 View Form Widget Demo - Email Sign-Up 1.0: A clean, minimal inline block purpose-built for gathering newsletter registrations with an inline success message.
🔗 View Email Sign-Up Demo - Enhanced Email Sign-Up Form 1.0 (Premium): Features additional graphic options designed to offer promotional incentives to registrants.
🔗 View Enhanced Sign-Up Demo - Contact Form and Social 1.0: Renders a contact form positioned side-by-side with your property's active social media profile profiles over a chosen background banner image.
🔗 View Contact and Social Demo - Email Sign-Up and Social 1.0: Combines a quick mailing list input box with your active social icons and a small image layout block.
🔗 View Sign-Up and Social Demo