
Read this first: you choose where before you choose what, and the fastest route is a starter. Both are explained below.
1. Switch the Page into Add Mode
- Navigate: Open the page you want to edit in the Page Editor.
- Click Add Widgets: It is in the top bar, beside Add Text, Page Settings and Page Preview.
- ⚠️ There is no "+" button inside a region. Add Widgets works on the whole page, which often confuses people.
- Result: The page now shows small green "Add it here" target zones between the existing blocks, one at every spot a widget could go.
2. Choose the Location
- Find the Spot: Scroll to where you want the new widget to sit.
- Click the Target Zone: Each zone is an exact position, not only a region. Clicking the one above the hero puts your widget above the hero.
- Result: The Select a Widget picker opens.
3. Pick the Widget: Look for "View Options" First
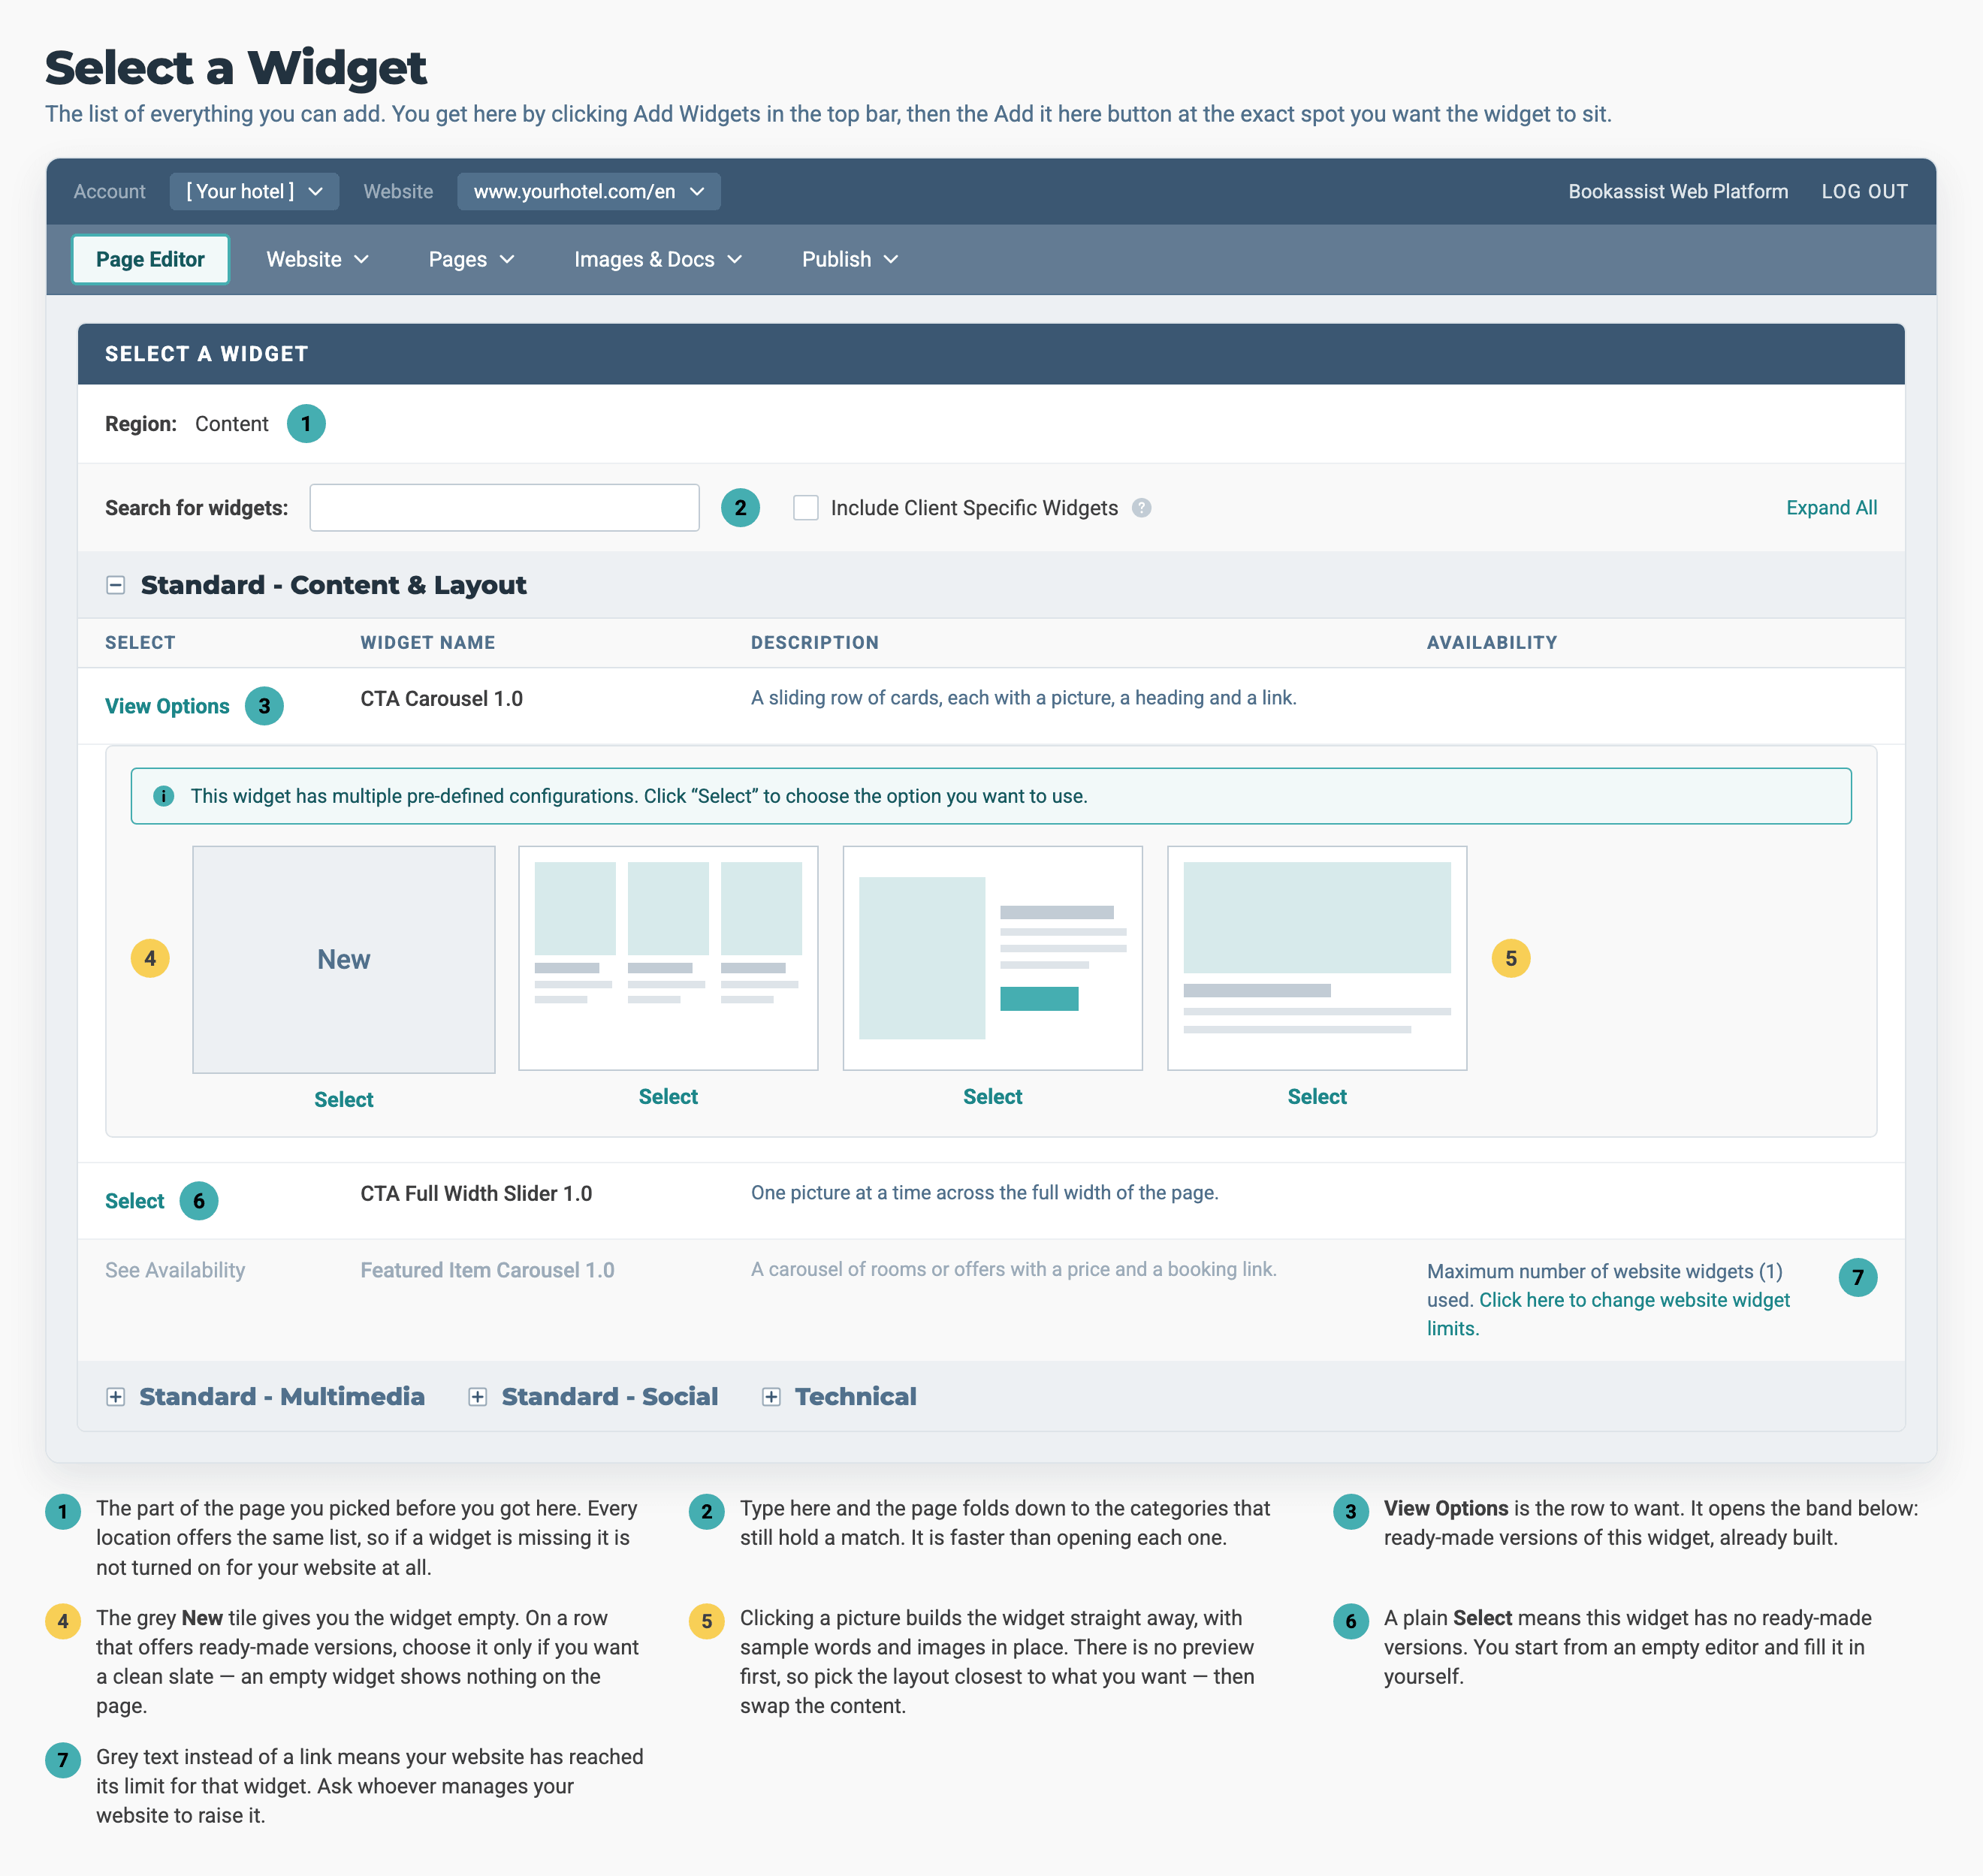
A row ends in one of three labels, and each one means something different. The band under View Options is what it opens: the ready-made versions, plus a grey New tile that gives you an empty widget.
The picker lists every widget available on your site, grouped into categories you can open and close. Each row shows one of three things:
| What you see | What it means |
|---|---|
| View Options | ⭐ Best case. This widget has ready-made versions. Expand it. |
| Select | Available, but you will start from an empty editor. |
| See Availability | Not available. Your site has reached its limit for this widget. Contact your account manager. |
- Expand View Options on the widget you want. You will see one or more screenshots of ready-made versions, plus a grey New tile.
- Study the screenshots. They usually show different layouts, such as image on the left or on the right, or two columns or three.
- Click the screenshot that is closest to what you want.
- ⚠️ This click creates the widget immediately. There is no preview first. You can then edit it like any other widget: change the wording and pictures, or delete it if it was the wrong choice.
- Result: The widget appears on your page already built, with sample content in place.
4. Replace the Sample Content
- Work Through the Rows: The slides, buttons or cards are already there. Click Edit on each one and replace the sample text and images with your own.
- Delete What You Don't Need: Remove any extra rows with the Delete button on the row.
- Add More: Use Add New if you need extra rows.
5. Save & Publish
- Save: Click Save on the widget panel.
- Check It: Use Page Preview to see the result before visitors do.
- Publish: Click Publish.
About two thirds of widgets have no ready-made versions. The steps are the same up to step 3, then they change in one important way.
- Click Select (or the grey New tile).
- Fill the Required Fields: They are marked with a red bar on the label. Most are already filled in. Check for any dropdown that was left blank.
- You will see this message, and it is not a fault:
Slides can be added here after saving.
Lists of rows, such as Slides, Buttons, Features and Cards, cannot be used until the widget has been saved once. There is no Add New button yet.
- Click Save. The message is replaced by the normal Add New controls, and the Disable Widget checkbox appears.
- Now build your rows, then Save and Publish as above.
In short: on this route, a widget with rows is built in two stages. If a required text field is the only thing stopping that first Save, type anything, save, and correct it afterwards.
Pro-Tips & Troubleshooting- Prefer a starter. It avoids the two stages and gives you a built widget straight away. Start from the blank New tile only when none of the ready-made versions is close, or when you want to start from nothing.
- The widget list is the same everywhere. It is not filtered by the location you picked, so every region shows the same list. If a widget is missing, it is not switched on for your site, and clicking a different target zone will not make it appear.
- Save the level you are editing. A slide's own Save is enough for that slide's content. You do not need to save the whole widget afterwards. The exception is reordering. If you drag rows into a new order, save the widget itself too.
- A row editor has no Cancel. There is only Save and New. To leave a row without saving it, close the window.
- "Save failed on a field I never touched." If you began with a starter, this is normal and not a fault. A starter sometimes arrives with a required field empty. Fill it in and save again.
- Just need a paragraph? Use Add Text in the top bar. It skips the picker.
- Deleting is instant. Deleting a widget shows no "are you sure?" message, and it removes the widget's rows and images too. If you might want the widget back, tick Disable Widget on the editor panel instead. That hides it from the live site and keeps everything.
- Already exists elsewhere? Don't rebuild it. Use Clone to copy a finished widget from another page or property. How to Move a Widget covers moving one instead. If Clone is not on the widget label, your account does not have permission to use it. Ask the person who manages your website.
→ Next: How to Move a Widget — moving one that is already on the page