
Read this first: folders are one flat list. A folder cannot sit inside another folder, so you group them by name. Names such as 01 - Rooms, 02 - Dining and 03 - Spa keep them in the order you want.
Step-by-Step Instructions
1. See What You Have
- Navigate: Hover Images & Docs in the menu bar and click Folders.
- Read the Grid: The grid lists every folder with its size and the number of files in it. The total for your site is above the grid.
- This is the only screen that tells you how much space your pictures use.
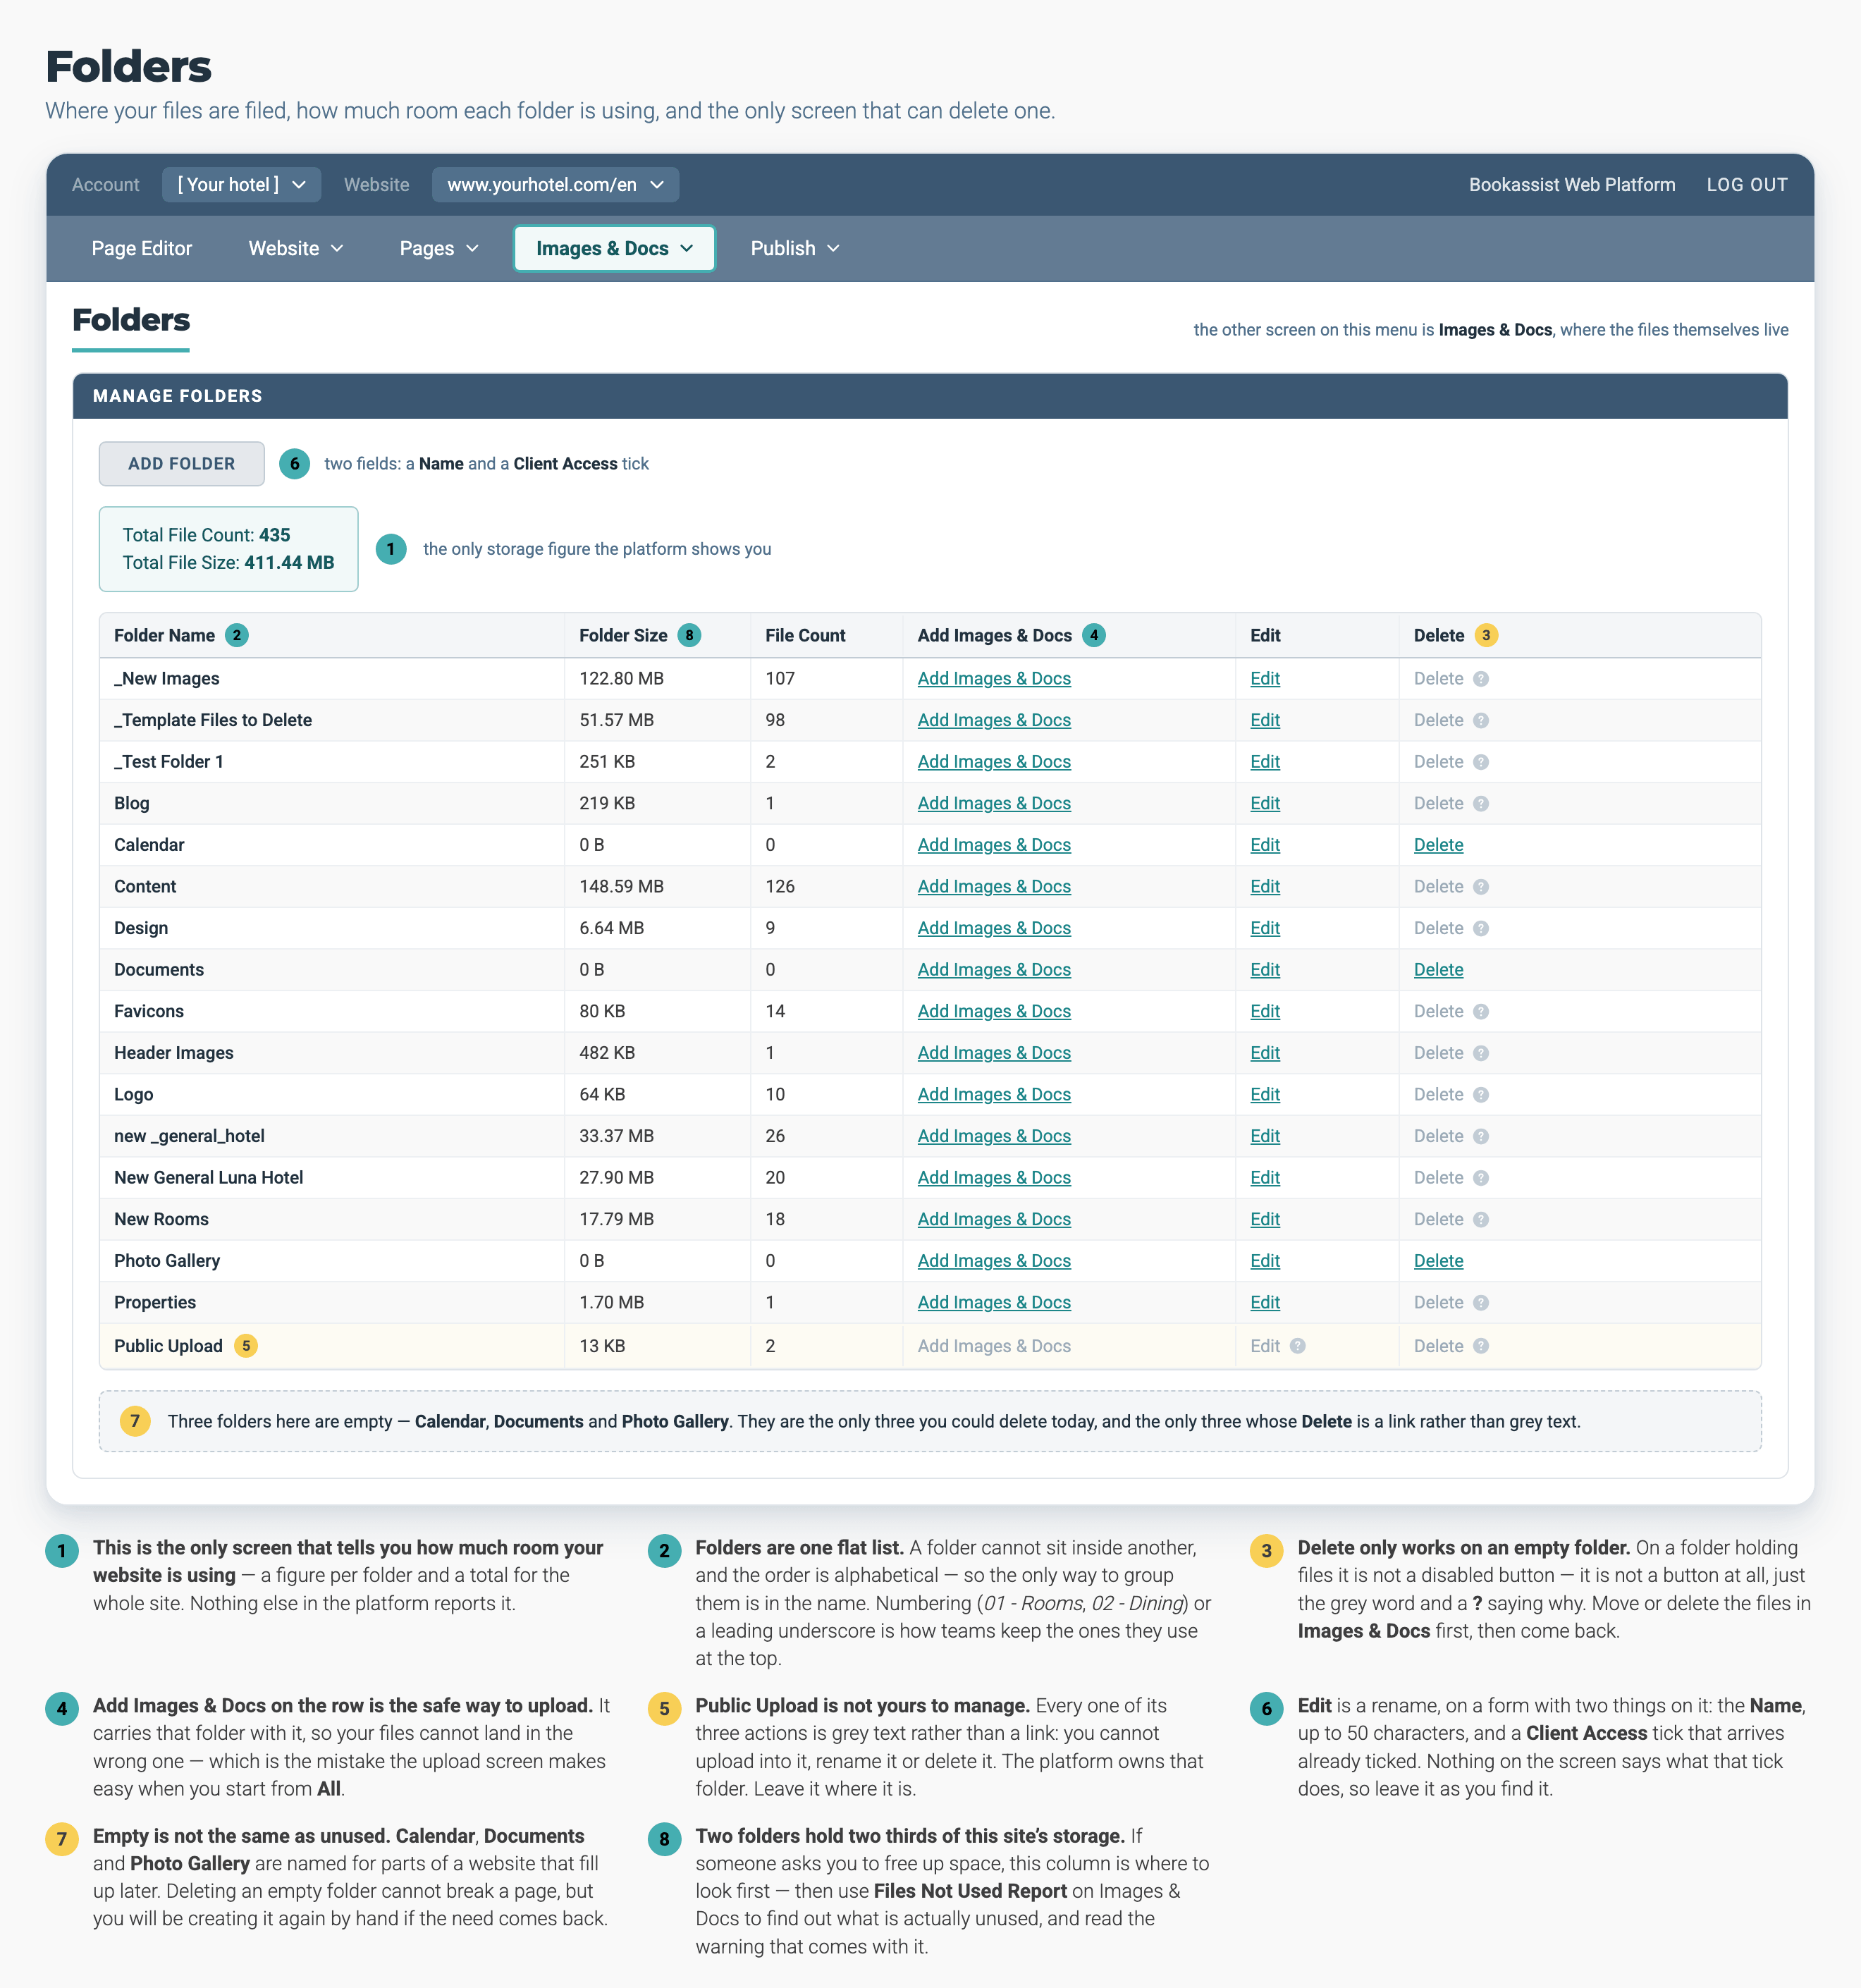
Look at the Delete column first. It is a link where the folder is empty, and grey text where the folder still holds files.
2. Add a Folder
- Click Add Folder.
- Type a Name: The name can be up to 50 characters, and it is the only field you must fill in. Use words a colleague would guess, such as Rooms, Restaurant, Weddings or Menus.
- Leave Client Access Ticked: It is already ticked.
- Click Save.
3. Upload Straight Into It
- Use the Row's Own Link: On the Folders screen each row has an Add Images & Docs link. Use this link, because the upload goes into the folder you came from.
- ⚠️ Starting an upload from Images & Docs with the Folder dropdown on All leaves the upload with no folder to go into. Select the folder first, or come in from this row.
- Upload as Normal: See How to Upload Images.
4. Move Files You Already Have
- Go to Images & Docs: Set the Folder dropdown to the folder you are emptying.
- Tick the Files: Or click Check All to tick every file on the screen.
- Open Mass Edit: Choose the destination in the folder dropdown, then click Move To Folder. Copy To Folder leaves the original where it is and adds a second copy.
- ⚠️ You can select up to 100 files at a time, so a large folder takes several rounds.
- Moving a file does not break any page that uses it. The pages still find the file in its new folder.
5. Delete a Folder You No Longer Need
- Empty It First: Move or delete everything in it. See How to Tidy Up Unused Files.
- Click Delete on the Row: The link appears only when the folder holds no files. On a folder that still holds files, Delete is plain text you cannot click, with a note that explains why.
Pro-Tips & Troubleshooting
- Delete is not clickable. The folder still has files in it. Empty it and the link appears.
- My uploads went somewhere unexpected. The upload form uses the folder you came from, not one you pick during the upload. Use the Add Images & Docs link on the folder's own row.
- A folder of PDFs shows up when I am choosing a picture. Pictures and documents share one set of folders, so every folder appears in both pickers.
- One folder will not open for editing. Public Upload is managed by the platform. You cannot rename it, and you cannot move files into it.
- The folder I want is missing from a widget's picker. The picker can be set up to offer fewer folders than the library holds. Ask whoever manages your website to add it.
- Number your folder names. There is no way to reorder the list by hand, and the names sort alphabetically, so start each name with 01 -, 02 - and so on to control the order.
- Do not build a folder per page. A folder for each subject (rooms, dining, spa, events) stays useful when the site is redesigned. Search finds the rest. See How to Search for Images.
→ Next: How to Upload Images — fill your new folder
Related: How to Search for Images — finding a picture once the library is large · How to Tidy Up Unused Files — emptying a folder before you delete it